在这篇文章中,我会向大家介绍如何使用微软 Windows Live 一系列工具和服务来创建存储高质量的全景图。这些整合的 Windows Live 存储托管和服务允许用户通过 HTML 获得强大的富互联网应用。你将会使用以下工具和服务:
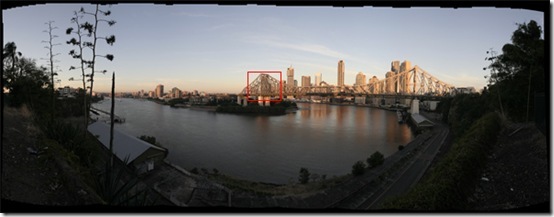
这个就是最终效果:缝合 8 张澳大利亚 Brisbane 的 Story Bridge 全景图。
第一步 – 确定一个好的主题
选择自己喜欢的主题(景点):

第二步 – Windows Live Photo Gallery
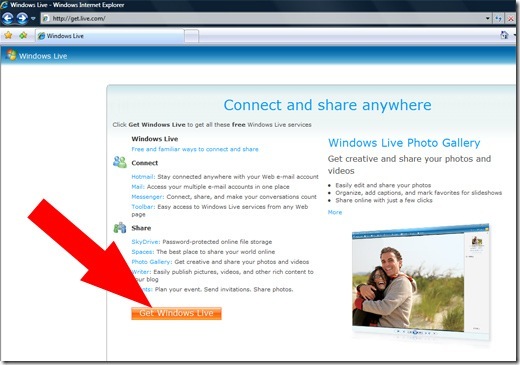
Windows Live Photo Gallery 是一个面向普通用户的照片管理和处理工具,可以在 http://get.live.com 这里下载获得。
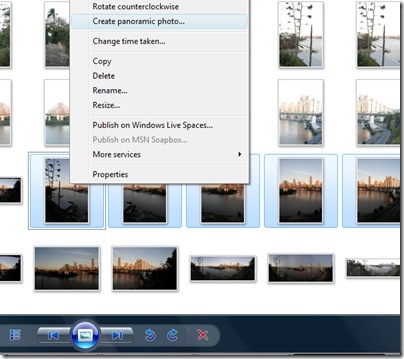
只需选中需要全景缝合的照片,右键选择“创建全景照片”:
通过这样处理,就可以获得以下效果的图,但如此高质量的照片(4.5MB),如何才能在网络上有效地共享该图呢?

第三步 – Deep Zoom Composer
我们可以利用 Silverlight 2 中的新技术:Deep Zoom 来解决上面这个难题。并且最新更新的 Deep Zoom Composer 只需几步就可以创建。下载 Deep Zoom Composer。
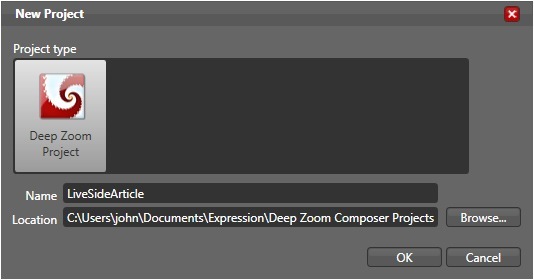
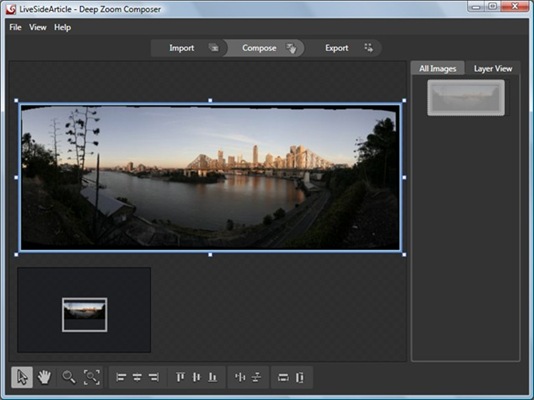
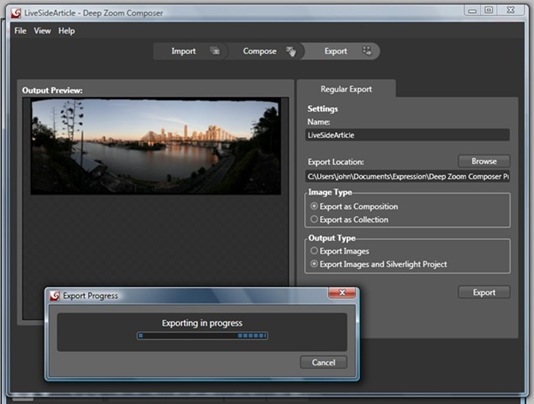
创建新的项目,导入照片,并拖至控制区。Deep Zoom Composer 允许你展示多张照片,重新排序,改变大小。
当我们选择导出的形式为 “Export Image and Silverlight Project” 时,这个 Project 可以生成一个完整的的可视化数据集,并准备开始使用 Silverlight2。这个 Project 包含了所有欲建立的程序所需的功能,你不需要再编写任何 .net 的 Silverlight 代码。
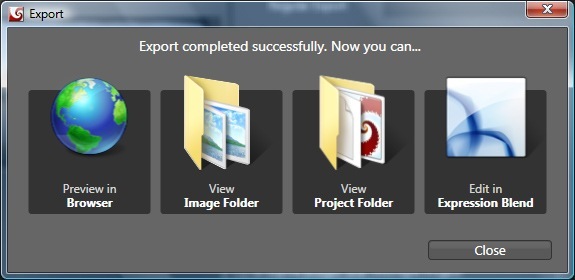
当导出完成,你可以在浏览器中预览 Silverlight 的应用。
第四步 – Silverlight Streaming
该应用大约 10MB。Windows Live Silverlight Streaming 服务能很好的解决部署 Silverlight 的问题。注册帐号:http://silverlight.live.com。
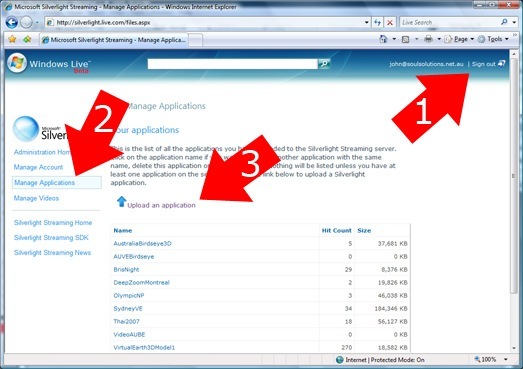
- 登录帐号
- 管理应用
- 点击上传应用
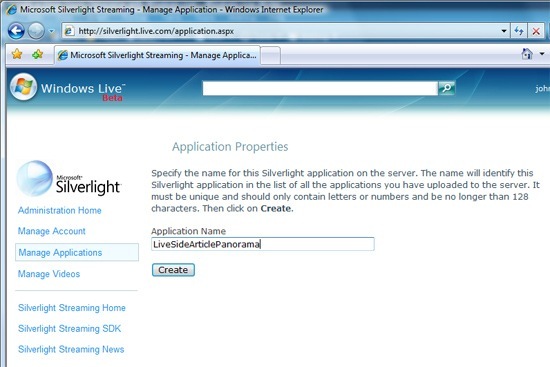
- 命名应用
- 创建 Manifest 文件
- Zip 该应用
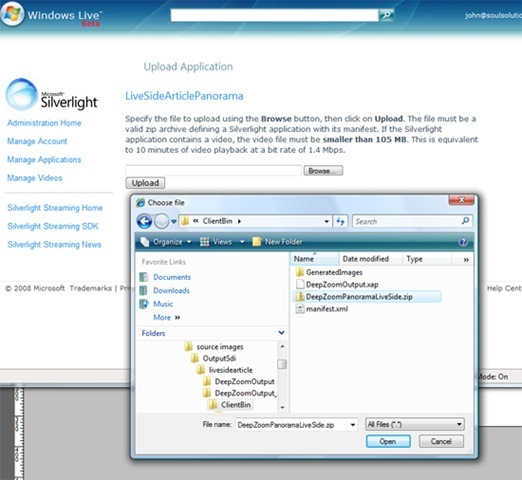
- 上传
- 获得 Iframe 代码
为了上传应用,你需要添加一个叫做 Manifest 的 XML 文件。它定义了该应用的属性,并且让 Silverlight 服务知道该如何处理该应用。这个是 Deep Zoom Composer 默认创建的代码:
<SilverlightApp> <version>2.0</version> <source>DeepZoomOutput.xap</source> <width>800</width> <height>600</height> <background>gray</background> <isWindowless>false</isWindowless> </SilverlightApp>
这个文件需要放置在 DeepZoomOutput.xap 和GeneratedImages 文件夹旁边的 “C:\Users\***\Documents\Expression\Deep Zoom Composer Projects\LiveSideArticle\source images\OutputSdi\livesidearticle\DeepZoomOutput_Web\ClientBin” 文件夹中。压缩这三个项目至一个 Zip 文件。
上传该压缩文件至 Silverlight Streaming。当它上传完之后,你就能获得代码,并且有两个显示该应用的选项。
你可以通过点击 “Launch Application Test Page” 预览该应用。
第五步 – Virtual Earth
这最后一步就是在该真实地理位置上展示该 Deep Zoom 照片。这需要一个简单的 HTML 页面并插入一些 Virtual Earth 的 JavaScript。这可以在悬浮窗口上显示刚才的 Silverlight 应用。
你只需要改变下面代码的经度纬度以及 Silverlight 应用地址,或者通过 http://maps.live.com 手动获得位置:
<!DOCTYPE html PUBLIC “-//W3C//DTD XHTML 1.0 Transitional//EN” “http://www.w3.org/TR/xhtml1/DTD/xhtml1-transitional.dtd”> <html xmlns=”http://www.w3.org/1999/xhtml”> <head> <title>Silverlight Streaming Panoramas on Virtual Earth</title> <meta http-equiv=”Content-Type” content=”text/html; charset=utf-8″ /> <script type=”text/javascript” src=”http://dev.virtualearth.net/mapcontrol/mapcontrol.ashx?v=6.1″> </script> <style type=”text/css”> body { } .customInfoBox-body { width: 420px; height: 260px; overflow: hidden; padding: 0px !important; top: 0 !important; } .customInfoBox-shadow { width: 420px; height: 260px; } .customInfoBox-with-leftBeak { width: 0 !important; height: 0 !important; } .VE_Pushpin_Popup_Title { padding: 5px; } .VE_Pushpin_Popup_Body { text-align: left; margin-left: 0px; } </style> <script type=”text/javascript”> var map = null; function GetMap() { map = new VEMap(“myMap”); map.onLoadMap = onLoadMap; map.LoadMap(new VELatLong(-27.46212,153.03705) , 16 , VEMapStyle.Aerial , false , VEMapMode.Mode2D , false); } function onLoadMap() { map.ClearInfoBoxStyles(); var shape = new VEShape(VEShapeType.Pushpin , new VELatLong(-27.46212,153.03705)); shape.SetTitle(‘The Story Bridge, Brisbane, Australia’); var desc = ‘<iframe src=”‘ + ‘http://silverlight.services.live.com/invoke/31868/LiveSideArticlePanorama/iframe.html”‘ + ‘ scrolling=”no” framestyle=’width:400px; height:200px’></iframe>’ shape.SetDescription(desc); shape.SetCustomIcon(‘pin.png’); map.AddShape(shape); map.Pan(200,0); //The pan causes our infobox to close so we have to wait 2 secs setTimeout(function(){ if (shape) map.ShowInfoBox(shape)},2000); } </script> </head> <body onload=”GetMap();”> <div id=”myMap” style=”position:relative; width:600px; height:600px;”></div> </body> </html></>
完成。
结论
这简单的五步就能完成这个很酷的应用,如:在博客中插入该 HTML,向好友们展示自己旅游的高质量照片。值得一用的功能。



评论当前被关闭。